I had to read many blogs and watch many YouTube videos in creating this table top, and I still made mistakes. I want to share with you what did and did not work for me.
Collecting:
I was inspired when I first saw one at my friend's apartment. I decided to use beer bottle caps, but soda will work as well. It took me about a year of collecting, and I drank these all myself. No, I'm kidding.
I had a slow start. At parties, I made sure to collect the bottle caps before leaving. As word of my project got out, more people helped me collect. My coworkers helped me a TON, and they really seemed to enjoy collecting the caps for me! I had some particularly awesome friends and family mail the caps to me.
Where ever there was an exotic selection of beer, I would buy a bottle based off the cap design. I began to ask bartenders for them whenever I was in a bar or restaurant. My biggest jackpot came from a bar in New Jersey, who gave me literally hundreds!
I even E-mailed two beer companies asking for bottle caps. Shout out to Shiner beer and Pabst Blue Ribbon, who actually mailed them over!! (Shiner is my favorite, and I wanted all the variants of caps on my table. PBR just made me look cool.)
The table:
The table:
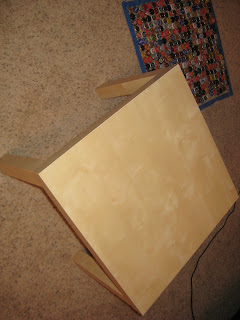
I bought the table from IKEA. It's the birch effect colored LACK table.
 |
| LACK IKEA Table |
Decoration:
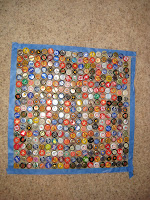
I cleaned out all the caps with a Clorox wipe and laid them out on the floor. I debated a bit on the design. I thought of doing an American Flag, but ultimately, it was too much of a stretch to work. I decided instead to do a random pattern.
 |
| 'Murka |
Application:
 |
| Of course, there were charming bottle caps. |
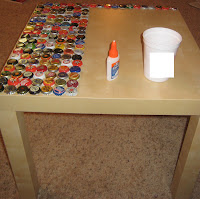
Make sure to use a lot of glue- it dries clear and is not noticeable once the resin is on top.
 |
| Name on cup withheld. |
Set Up:
After all the caps were glued on, it was time to prepare the table for the resin. This is where I made the biggest mistakes. I cut up a bunch of cardboard boxes and covered the bottom of it in blue painter's tape. It comes off walls, so it should come off dried resin, right? Not so much. But we'll get to that later.
I taped all the cardboard onto the table's edge with more blue painter's tape. Unfortunately, I didn't photograph this because I was in the zone. If you can imagine, the layers were: edge of table, blue painter's tape attached to cardboard, held secure with more blue painter's tape. I had tons of cardboard, and I wrapped it all around the table, staying aware of the edges. Once I felt that the cardboard created enough of a boarder/edge so that the resin wouldn't spill over, I started to prepare my work space.
Work Space:
I poured the resin while outside, when it was about 70 degrees outside. I put a bunch of plastic bags under the table, which proved a smart idea!
Resin:
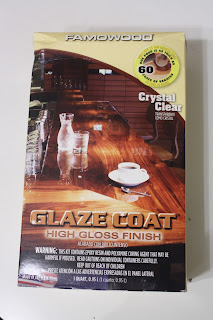
I explained my projects to the nice men at Lowe's, and they directed me to Famowood Glaze Coat High Gloss Finish. I bought two of these packages which equaled two quarts. Let me say, it was expensive!!
If you stuck with me through this, you're a true gangster. I really hope that this helps some people out. If you have any questions, please don't hesitate to ask me!
The instructions are on the box. I bought two containers to mix it in and two paint mixing sticks (which were free.) This glaze coat works with a 1:1 ratio. I started off mixing half the first coat and half the second one. After the initial pour, I decided to add the other two halves. I wore plastic gloves, because this got very messy! You have to mix for something like 2 minutes, and it was pretty obvious to me whenever the containers were totally blended. Slowly I poured this mix over the top of the table top & bottle caps. I used plastic cards (specifically expired gift cards the demo credit cards that you get in the mail) to smooth out the resin and try to help it flow evenly.
Now, in this step is where I messed up first. Not all the bottle caps were glued down flush, and little air bubbles began to escape from the bottom of various table tops. For the most part, they rose to the top rather quickly and popped on their own. For those that I had to ease to pop, I used a toothpick. I was under the impression that it would be super hard to work with the resin once it was poured, but that was not the case. I had maybe a 5-10 minute window to pop all the bubbles I could find and remove any rogue leaves that may have found their way into the top. I did not feel like time was against me here. In hind sight, I would have just tried to make sure that no air could escape from under the caps whenever I first poured the glaze coat. This might have been able to be prevented by using more Elmer's Glue.
I quickly encountered problem number two. Blue tape alone can not hold up that much pressure, and the resin quickly began to seep out of the sides, down the legs, and onto the floor! That caused a lot of anxiety, I tried to squeeze the cardboard closer to the table's edge, but it did not work. The seeping was not too ridiculous, I didn't waste too much of the glaze coat, but it was a setback.
In hindsight, I would have tried two different things. Either I would have used a much smaller first coat (half of each container, instead of ultimately using the entire container on the first layer) or I would have nailed wood to the edges of the table. The latter would have caused nail holes, but I do think it would have better prevented any of the resin from seeping. A thinner first coat (sometimes called a flood coat) would have sealed the cardboard to the edges, and would have been a shorter distance for the initial air bubbles to rise to the top.
When the first layer was finished but not completely set, I used a little bit of sandpaper to lightly scratch the surface, making sure to avoid scratching the actual bottle caps. I made the scratches so the second layer would adhere better. If the first layer had been completely dry, I would have been concerned that the second layer would create a visible line. The way I did it, the second layer completely adhered to the first and resulted in a smooth finish. I did not have as much leaking of the glaze coat on the second coating, as the first coat caused the resin to adhere to the cardboard.
Final Touches:
I let the table dry for about 48 hours before I touched it. I took off all the cardboard and blue tape to the best of my ability. I found that the glaze coat that had spilled onto the table's legs actually peeled off very easily. I used a razor blade to skim off any thin layers, and I sliced part of my nail in the process. It didn't hurt or go all the way through, but I'm still waiting on that part of the nail to completely grow out. Okay, sorry.
Soon enough, my final mistake surfaced. I covered the cardboard in blue tape with the thought that the blue tape would easily peel off of the dried glaze coat. This was not the case. The edge of the table top was actually a very opaque blue. It took literally hours of scrubbing Q-tips, sandpaper, and toothpaste dipped in nail polish remover, cider, water, toothpaste... anything I had in the house that I could think would remove the blue tape. Eventually, I got most of the blue tape. I thought the table edges was "good enough for jazz" and called it a day.
.JPG) |
| Anchor Steam |
.JPG) |
| I thought this was the coolest bottle cap |
.JPG) |
| Shiner love |
.JPG) |
| More Shiner |
.JPG)

